
Why “Kitchen” Curry? I named it after the reason I developed it: After thirty years, I’m renovating my kitchen. We live in an old house, so we already know that renovation projects never go as planned. There’s always something turning up that nobody anticipated. Long story short, I will be without a kitchen for at least six to seven weeks this autumn, and possibly as long as three months, so I’m stocking up on freezer meals.
The curry was too runny when I tried making it in the Instant Pot’s inner pot. In order to have enough liquid to get the pot up to pressure, there was too much liquid to make a nice thick sauce. Rather than try to use the “Sauté” function to try to boil some of the water off, I chose to use my nifty new ekovana pans. (I’m including the link for convenience only. I don’t get anything from Amazon.) They even come with a handle, to make removal easy. If you don’t have them, you can use any heat-safe pans that will fit. I know lots of folks use cake pans and cover them with foil. Just be sure to use trivets to keep the pans out of the water and the top pan from falling in on the bottom pan. You can make a sling from foil, too, to make it easier to get them out of the pot.
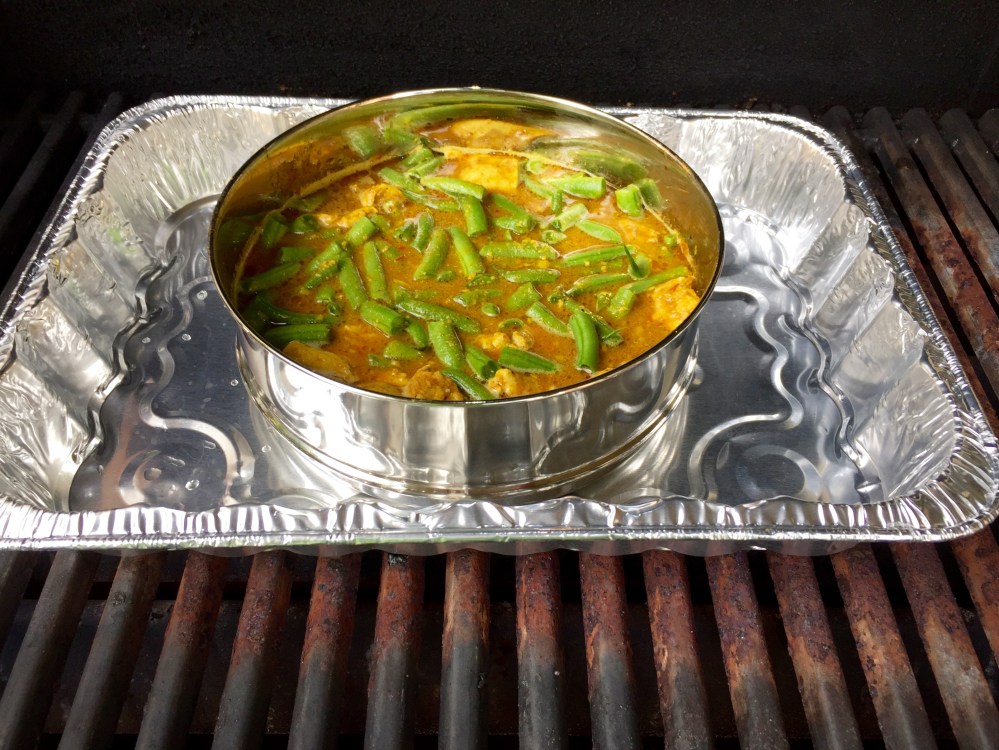
Confession time: I really need to make this again to get better pictures, and figure out if I can cook it without thawing it first. But I promised some folks I’d get the recipe up today, and I’m a woman of my word. I know it works cooked the same day as it’s assembled, or if thawed first. But when I made it to see how long to cook it from frozen, I only got part of the way through the cook time before the power went out! That happens a lot around here. Of course, I’d waited to do pictures until this time, so those are a bit messed up too. I ended up finishing the cooking outside on the grill. I had planned to cook the green beans separately. They were fresh from the garden and didn’t need any seasoning. But, unless I wanted them raw, the best thing was to toss ‘em in the curry. I think they made the curry a bit runnier than I like, but it’s better than no dinner! I’ll come back this fall when I’m cooking the other batches I froze, and update. And next time I freeze some, I think I’ll be using plastic bags lining the ekovana pan. Once frozen, I can pop the bags out so I can use the pan for other meals, but the frozen block will fit perfectly when I’m ready to cook.
You’ll find a printer-friendly version of the recipe, without the beans, at the bottom of this page.
Ingredients:
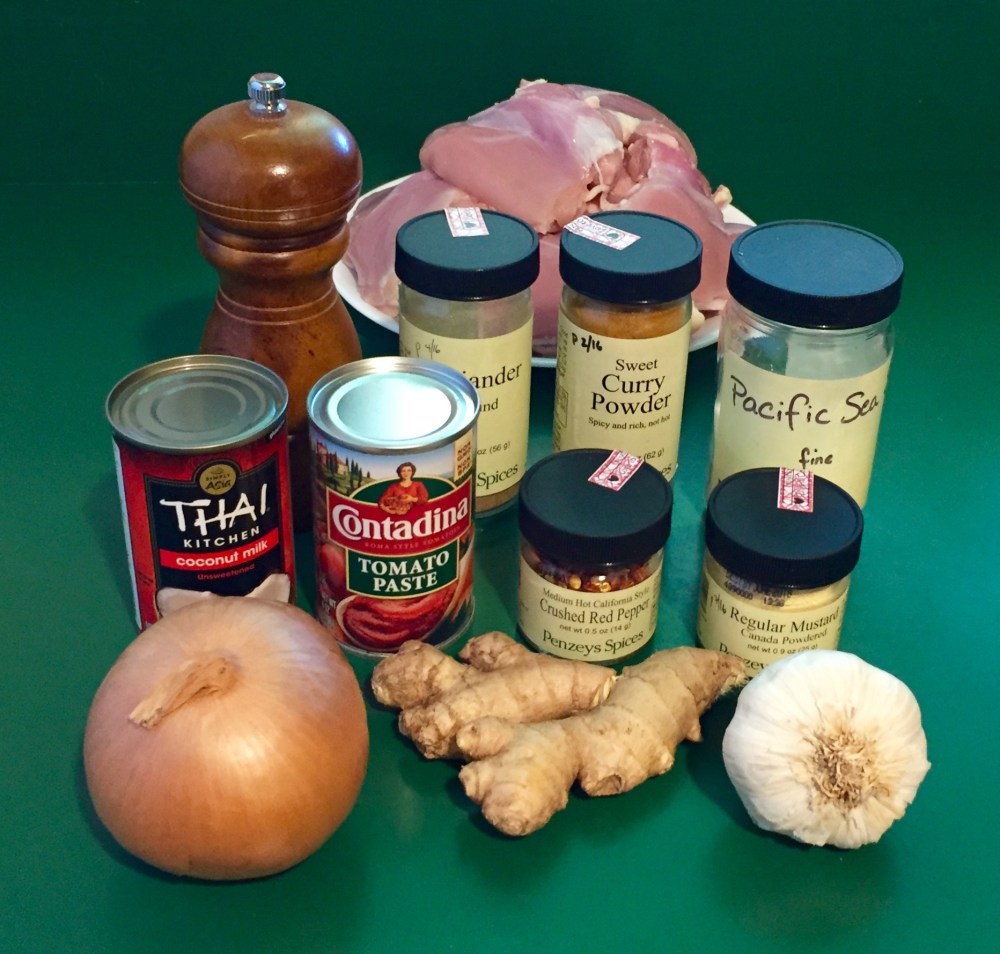
5½ oz coconut milk
1 Tbsp tomato paste
4 tsp curry powder (about 8g)
1½ tsp ground coriander
¾ tsp crushed red pepper (a.k.a. “crushers”)
¼ tsp kosher salt
¼ tsp freshly ground black pepper
¼ tsp ground mustard
1½” knob of fresh ginger root
2 cloves garlic
6 boneless, skinless chicken thighs (about 28 oz.)
½ cup rice
2 cups water, divided
Preparation:
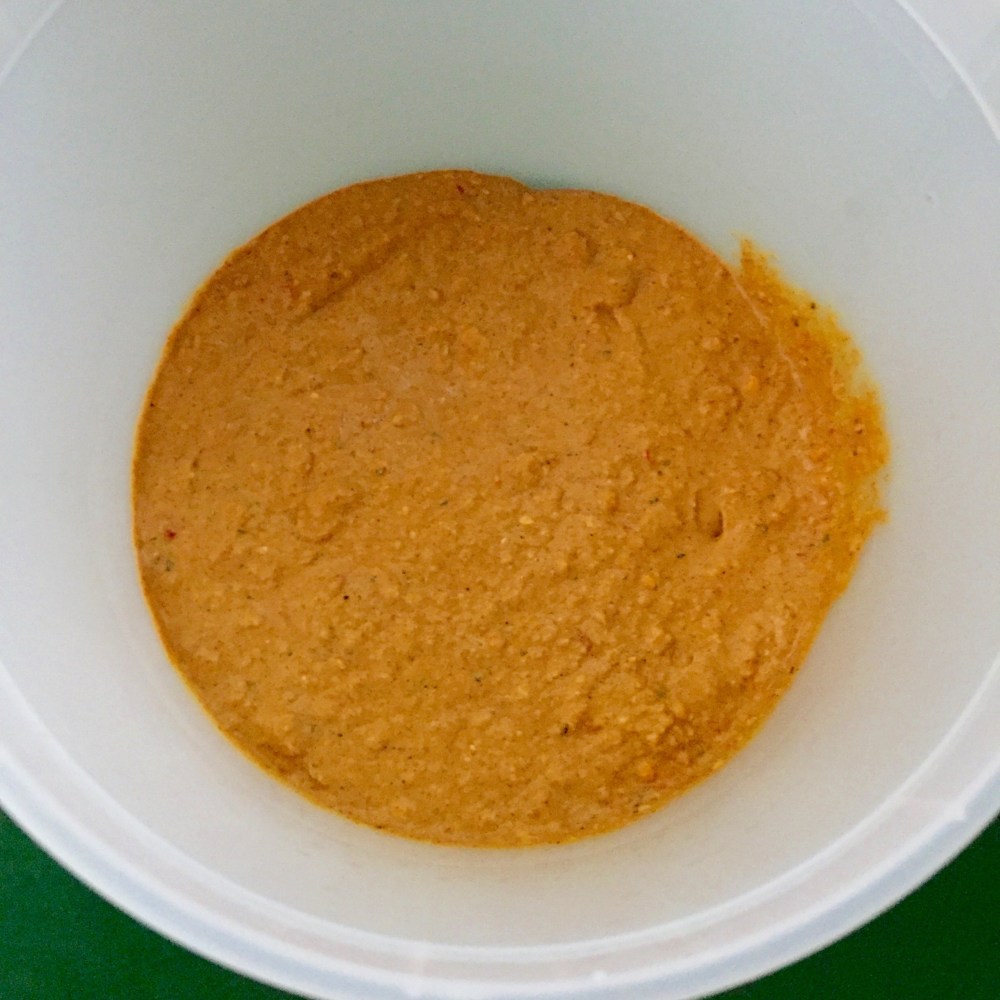
1.) In a 64-oz freezer container, whisk together coconut milk and tomato paste until smooth. Add curry powder, coriander, crushers, salt, pepper, and mustard; mix well. Of course, you could make this right now by simply mixing everything in the pan instead of a freezer container, skipping freezing and step four, and proceeding directly to cooking.
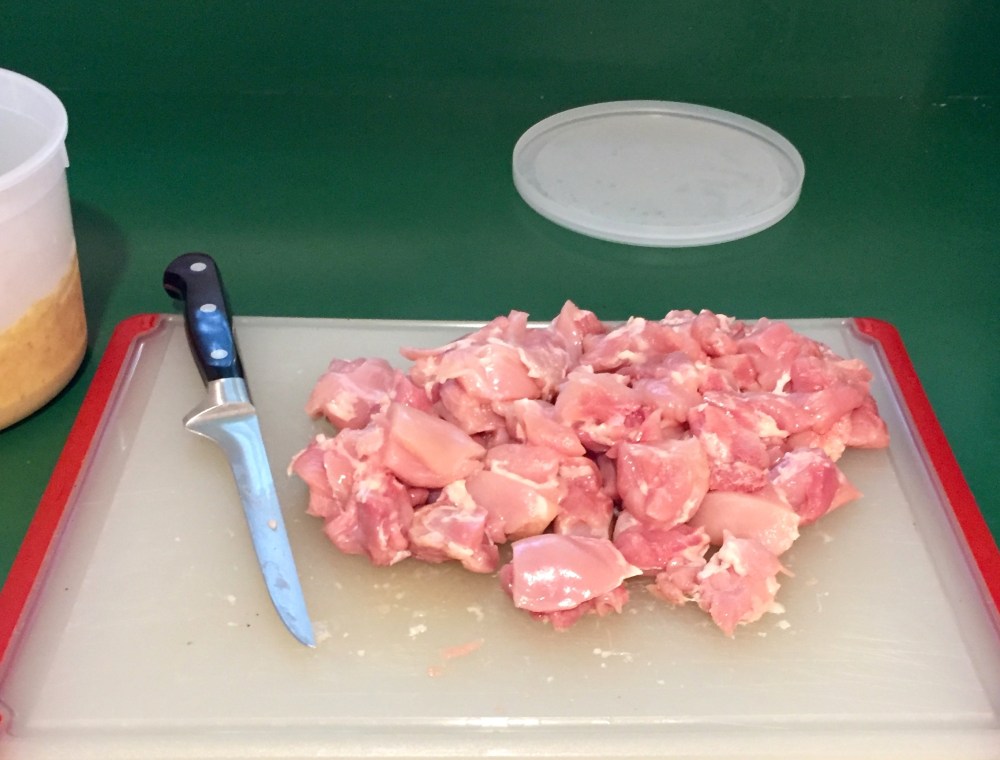
2.) Trim the chicken of fat. Cut into bite-sized pieces.
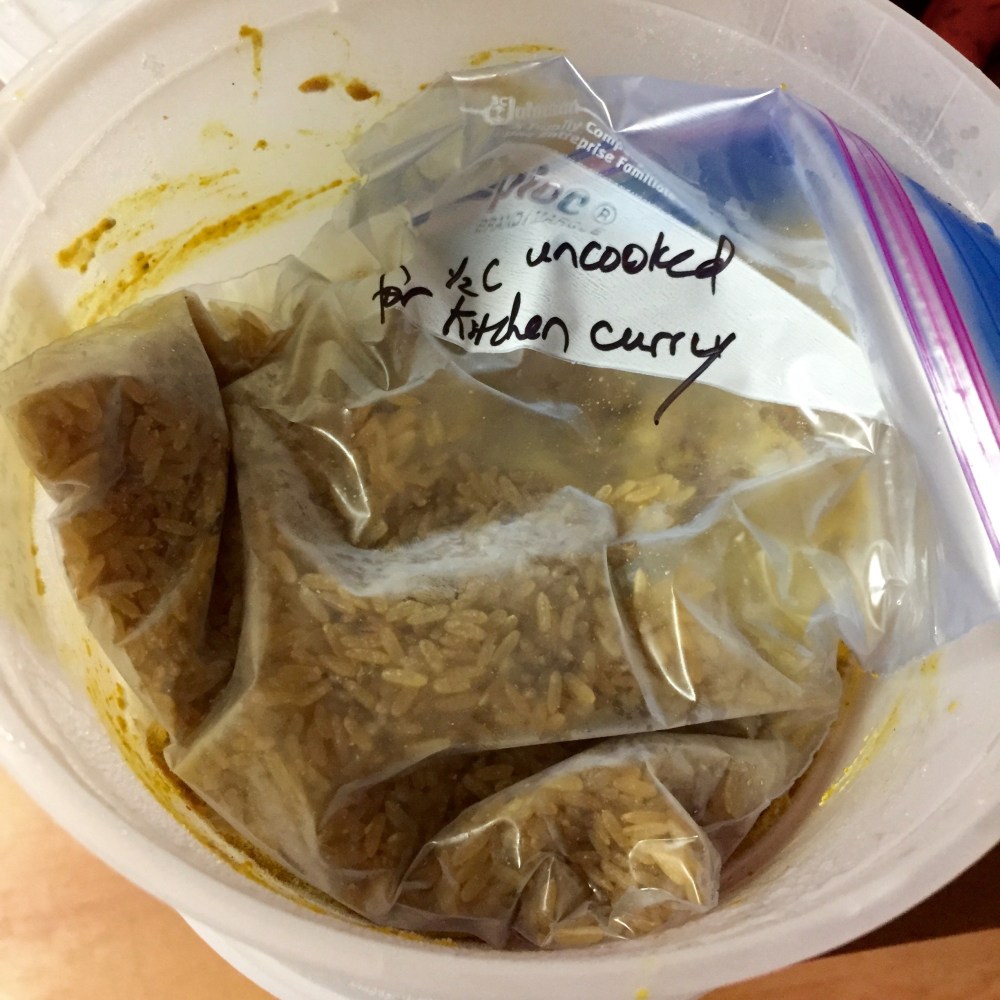
3.) Peel and mince the ginger root, for about one tablespoon. Peel and mince the garlic. Stir the ginger and garlic into the container. Add the chicken, stirring to evenly distribute. Label and freeze.


5.) Move the container from the freezer to the fridge two days (more?) before you’ll be cooking the curry. It takes the coconut milk longer to thaw, so in order for everything to cook evenly, it’s best to start from fridge temps. Remove the bag of rice, and set it aside until cook day. (Once I’ve figured out how long to cook from a frozen block, I’ll update here.)
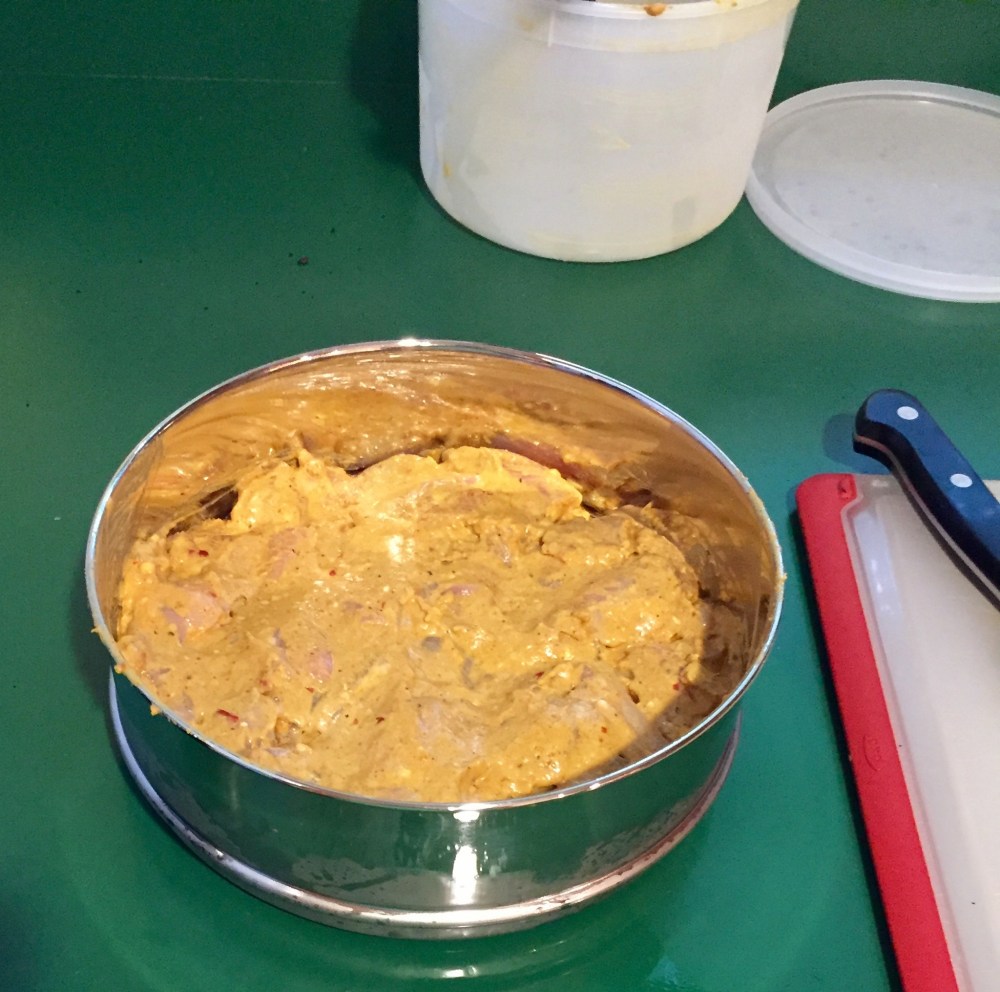
6.) When ready to cook, dump the curry mixture into one pan.
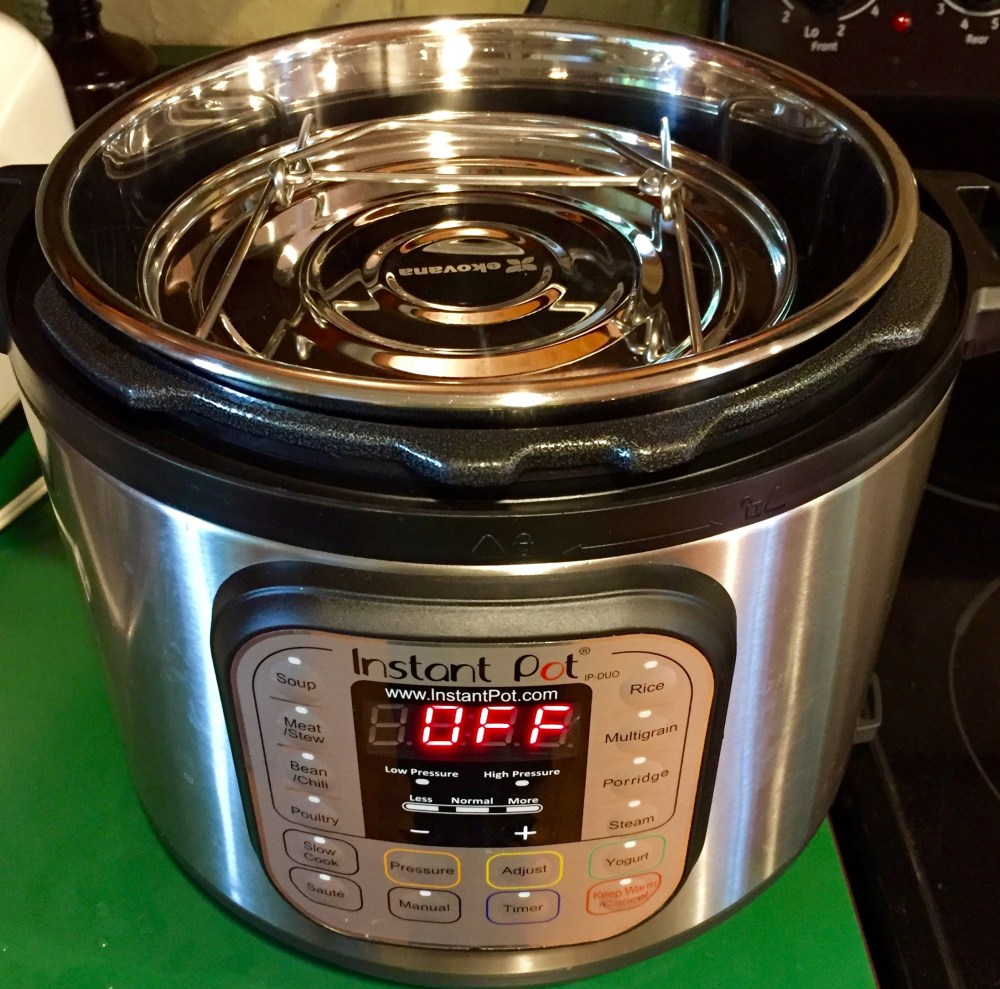
7.) Empty the rice into the other pan, along with 1 cup of the water. Put the rice pan on top of the curry pan, and the lid on top of the rice pan. Fasten the handles.


9.) Close and lock the lid, and seal the steam valve. Using the “Manual” button, set the pot for 10 minutes at high pressure. Allow a full 15 minute NPR (Natural Pressure Release). Carefully release any remaining pressure, remove the pans, and serve the curry over the rice.

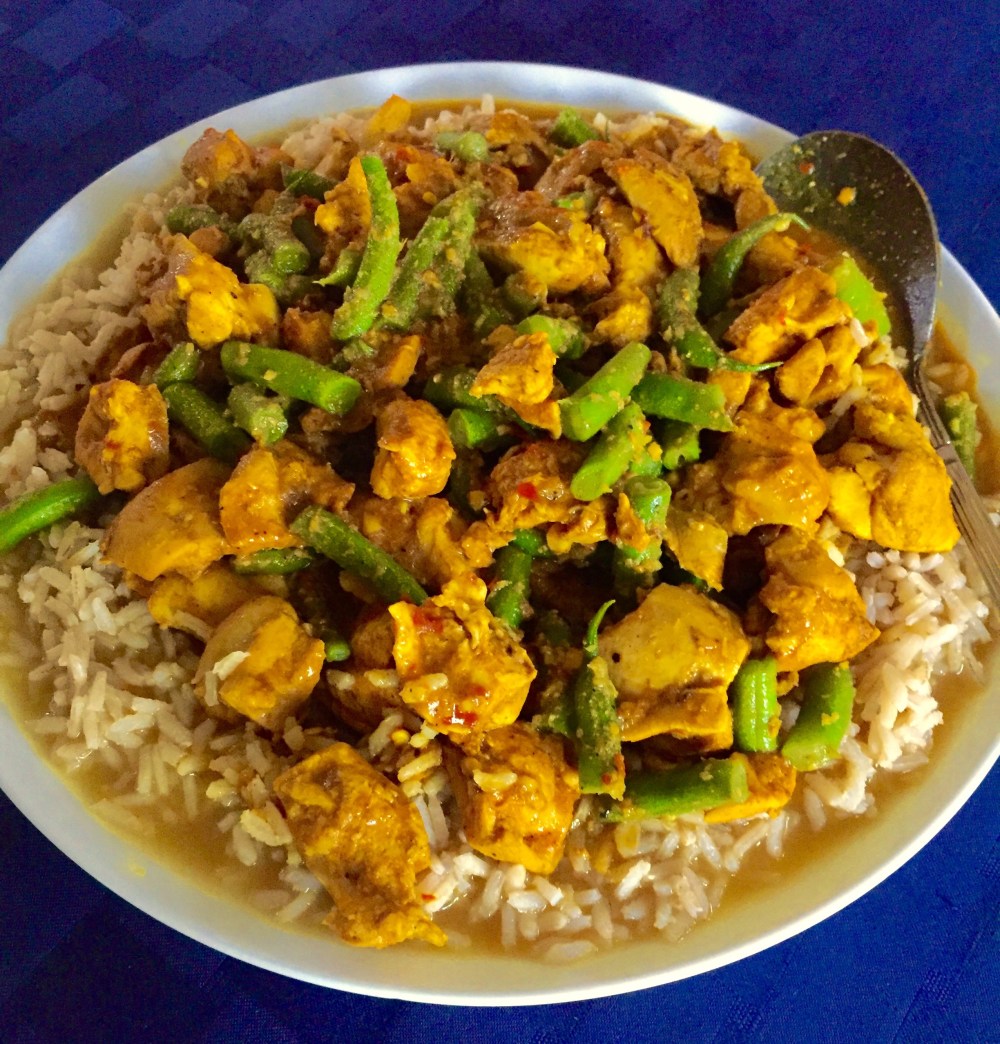
Kitchen Curry With Rice
Ingredients
5½ oz coconut milk
1 Tbsp tomato paste
4 tsp curry powder (about 8g)
1½ tsp ground coriander
¾ tsp crushed red pepper (a.k.a. “crushers”)
¼ tsp kosher salt
¼ tsp freshly ground black pepper
¼ tsp ground mustard
1½” knob of fresh ginger root
2 cloves garlic
6 boneless, skinless chicken thighs (about 28 oz.)
½ cup rice
2 cups water, divided
Directions
1.) In a 64-oz freezer container, whisk together coconut milk and tomato paste until smooth. Add curry powder, coriander, crushers, salt, pepper, and mustard; mix well.
2.) Trim the chicken of fat. Cut into bite-sized pieces.
3.) Peel and mince the ginger root, for about one tablespoon. Peel and mince the garlic. Stir the ginger and garlic into the container.
Add the chicken to the pot, stirring to evenly distribute. Label and freeze.
4.) Once the curry is completely frozen, measure the rice into a zip-top freezer bag. Open the frozen curry container, and tuck the rice bag on top of the frozen contents. Replace the cover on the container, and put the container back in the freezer.
5.) Move the container from the freezer to the fridge two days (more?) before you’ll be cooking the curry. It takes the coconut milk longer to thaw, so in order for everything to cook evenly, it’s best to start from fridge temps. Remove the bag of rice, and set it aside until cook day.
6.) When ready to cook, dump the curry mixture into one pan.
7.) Empty the rice into the other pan, along with 1 cup of the water. Put the rice pan on top of the curry pan, and the lid on top of the rice pan. Fasten the handles.
8.) Put 1 cup of water into the bottom of the Instant Pot’s inner pot. Carefully place the pot stack into the Instant Pot.
9.) Close and lock the lid, and seal the steam valve. Using the “Manual” button, set the pot for 10 minutes at high pressure. Allow a full 15 minute NPR (Natural Pressure Release). Carefully release any remaining pressure, remove the pans, and serve the curry over the rice.

We have three kids, work from home and homeschool. Ideas like this are pure gold. Thanks, especially for the detailed directions and thoughtful presentation.
LikeLiked by 1 person
What a nice thing to say! Thanks! I’m glad you enjoyed the post. I have a couple more Instant Pot freezer meals coming this fall, so stay tuned.
LikeLike