

Ready to take the leap and move on from SourFaux? Tackle a loaf with no added yeast? It’s fun! There’s something almost magical about watching a combination of flour and water transform itself into dough.
I had such good results following Serious Eats’ method of making Sourdough Starter that I decided to try their recipe for the bread. It came out beautifully! Don’t be surprised if this becomes your go-to recipe. Like all sourdough, it does require an investment of time, but I think you’ll agree it’s worth it. I followed the instructions to the letter the first time I made it. After that, I skipped the hand-kneading and just finished with the mixer. I really like the last few minutes of kneading by hand. As bread dough transforms from a lump of wet flour into a living, elastic thing, the change in its texture is really quite marvelous. To me, it’s like petting a soft puppy – a blissful tactile experience. The other advantage is that every time you bake bread, you gain more understanding of how the dough should look and feel. That’s how experienced bakers know when to deviate a bit from the recipe to add a little more flour or water – they just know how the dough should feel. If you’re like me and have physical limitations, just finish it off in the mixer. You might take a little longer to gain experience, but your bread will still be delicious!
Ingredients:

4 ounces (113 g) ripe sourdough starter
10 ounces (284 g) all-purpose (plain) flour, divided
5 ounces (148 ml) of water, divided
1 teaspoon salt
1 tablespoon olive oil
Preparation:
1.) The night before you’re planning to bake, harvest the ripe sourdough starter. I like to feed it a few hours before harvesting, to be sure it’s at its most active.


2.) Place the starter in the bowl of your stand mixer. (I used a glass bowl for this step in the photos, to better demonstrate what it does while you’re asleep.) Mix in 2 ounces (57 g) of the flour and 1 ounce (30 ml) of the water. Cover, and let it rest overnight at room temperature.


3.) The next day, it will look very different:


Add the remaining 8 ounces (227 g) flour and the remaining 4 ounces (118 ml) water to the bowl. Fit the mixer with the dough hook, and knead the mixture until it becomes elastic. This took me about 3 minutes.
4.) Add the salt and oil to the bowl and knead until combined. It’s going to seem impossible at first. The second picture looks like the oil will never distribute throughout the dough. Stick with it, it only takes another 5 minutes or so.


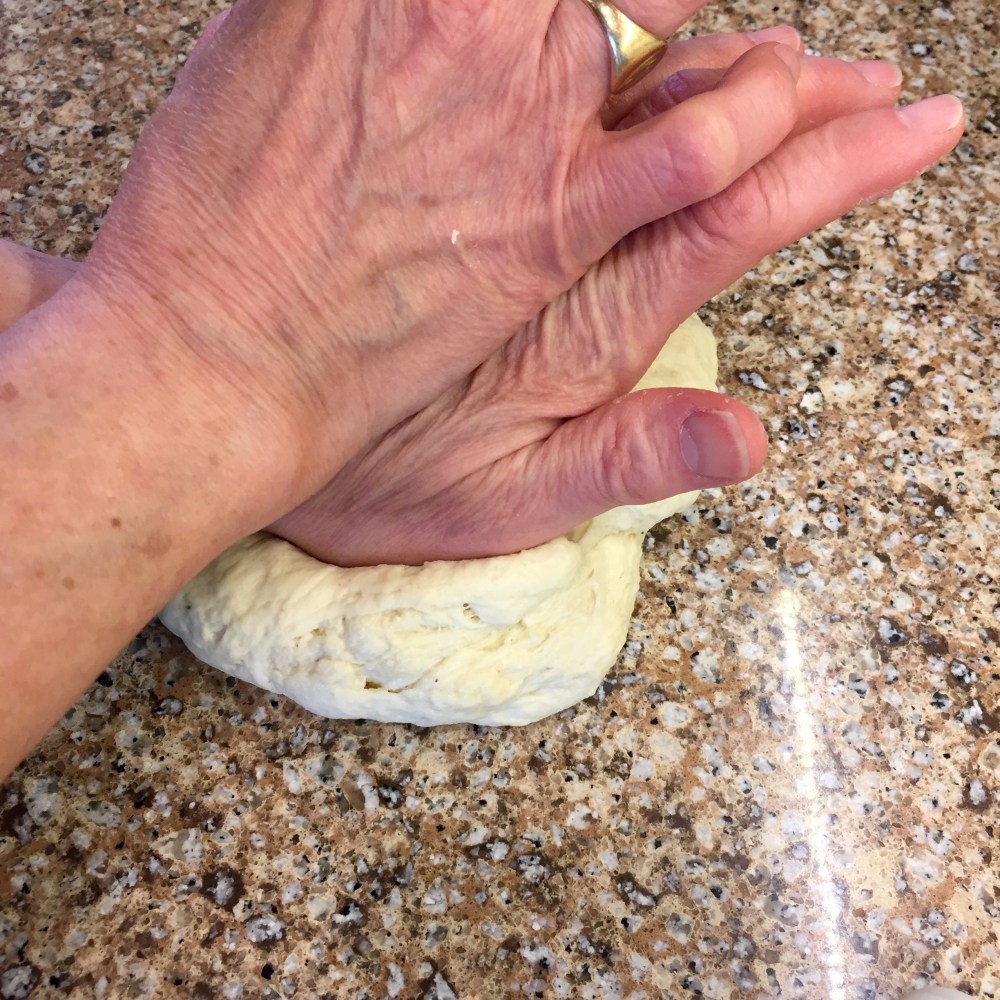
5.) Once it’s combined, move it to a clean work surface. I didn’t use any oil or flour on my counter this time, and had no trouble with the dough sticking; I do usually use a little oil. Knead by hand until the entire ball of dough is elastic.
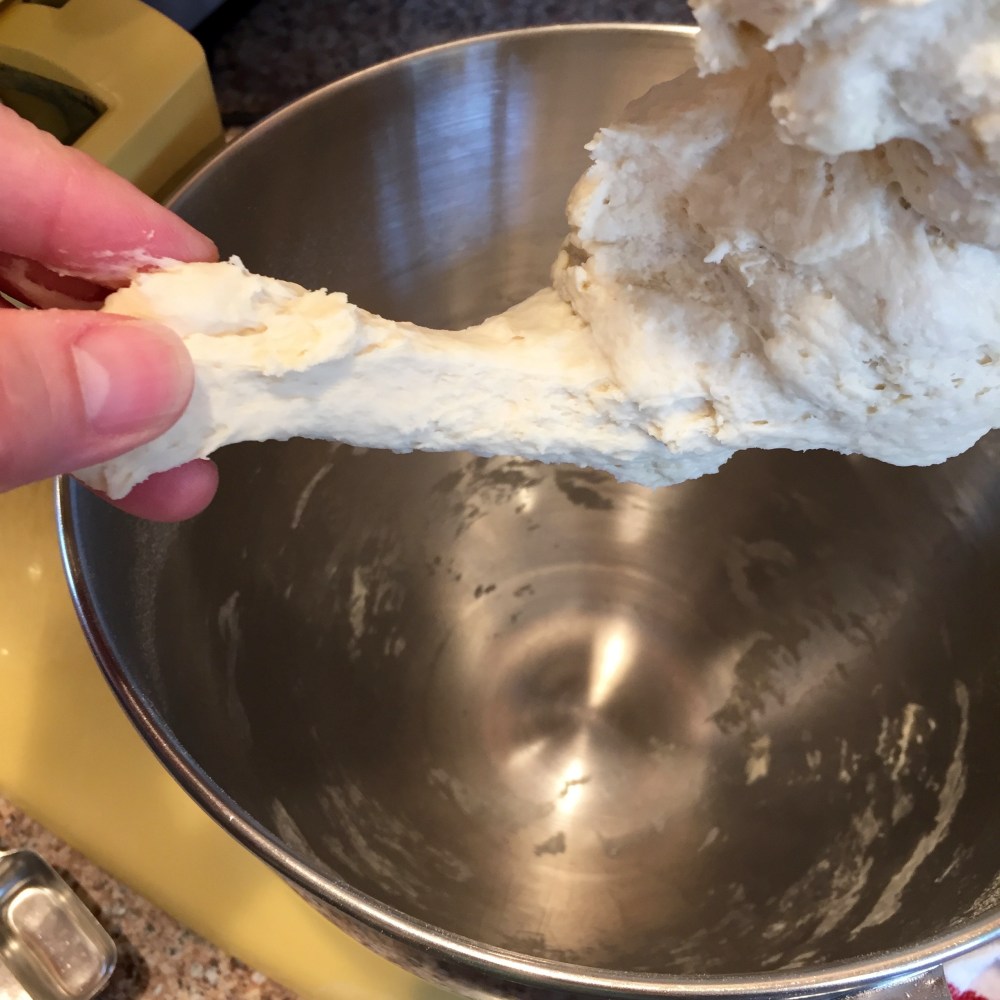
You can tell it’s ready by the windowpane test. Pinch off a small piece of the dough. Flatten it, then stretch it with your fingers. It should stretch thinly enough that you can see light through it before it breaks.


6.) Form the dough into a disc or ball, and transfer it to a lightly oiled dough bucket or bowl. Cover. If you’d like to wait another day before baking, you can pop it in the fridge now. It will need about 2 hours later to come up to room temperature before rising.


7.) Let the dough rise until it has doubled, about 2 or 3 hours. If your kitchen is cool, you can put the bucket in the cold oven with the light on. That little bit of extra warmth can help the rise.


8.) If you plan a freeform loaf, prepare a baking sheet by lining it with parchment and sprinkling a little cornmeal. If you’re using a pan, lightly grease it. Empty the dough onto your work surface and shape as desired. Some folks like a boule (ball), others prefer an oval loaf. I prefer a standard bread pan because I’m now using sourdough for toast and sandwiches. I find the loaf pan shape easier to cut. You also get a taller loaf because the sides of the pan provide support as the dough rises. I flattened the dough into a rectangle, rolled it up, turned under the ends, and put the roll seam-side-down in the pan.


9.) Cover with lightly oiled plastic wrap, slightly tented. Let the dough rise until it has again doubled. This rise is faster, about 1 to 2 hours. Towards the end of the rise time, preheat the oven to 350º F (177º C).


10.) Remove the plastic wrap, slash the top of the loaf, and pop it in the oven.

A note about slashing: You’ll need a very sharp knife or a bakers’ lame (pronounced “lahm.”) You’ll also need a swift, sure stroke, which of course most people don’t get on the first try. How can you be sure when you’ve never done it before? First off, don’t think of it like a balloon. It’s not going to pop if you cut it. Second, the dough won’t offer much resistance. It’s similar to cutting soft butter, I think. The difference is that if you go too slowly, the knife will catch on the dough and tear it. If your knife maybe isn’t as sharp as you wish, it’s helpful to rub just a touch of oil on the edge. Carefully, of course, so you don’t cut yourself. If you end up slashing too shallowly, you can always go over the cut a second time. I try to go about ½” (1 cm) deep.
Bake about 35 to 40 minutes, or until the crust is a deep, golden brown.
11.) Remove the bread from the oven and set it on a wire rack to cool. If you’ve used a bread pan, go ahead and tip the loaf out onto the rack.


You’ll be happier with the texture of your bread if you let it cool completely before cutting. It’s scrumptious warm from the oven, no argument from me, but cutting while warm leads to slightly gummy, dry bread.

Basic Sourdough Bread
Ingredients
4 ounces (113 g) ripe sourdough starter
10 ounces (284 g) all-purpose (plain) flour, divided
5 ounces (148 ml) of water, divided
1 teaspoon salt
1 tablespoon olive oil
Directions
1.) The night before you’re planning to bake, harvest the ripe sourdough starter. Feed it a few hours before harvesting, to be sure it’s at its most active.
2.) Place the starter in the bowl of your stand mixer. Mix in 2 ounces (57 g) of the flour and 1 ounce (30 ml) of the water. Cover, and let it rest overnight at room temperature.
3.) The next day, add the remaining 8 ounces (227 g) flour and the remaining 4 ounces (118 ml) water to the bowl. Fit the mixer with the dough hook, and knead the mixture until it becomes elastic, about 3 minutes.
4.) Add the salt and oil to the bowl and knead until combined, another 5 minutes or so.
5.) Once it’s combined, move it to a clean work surface. Knead by hand until the entire ball of dough is elastic. You can tell it’s ready by the windowpane test. Pinch off a small piece of the dough. Flatten it, then stretch it with your fingers. It should stretch thinly enough that you can see light through it before it breaks.
6.) Form the dough into a disc or ball, and transfer it to a lightly oiled dough bucket or bowl. Cover. If you’d like to wait another day before baking, you can pop it in the fridge now. It will need about 2 hours later to come up to room temperature before rising.
7.) Let the dough rise until it has doubled, about 2 or 3 hours. If your kitchen is cool, you can put the bucket in the cold oven with the light on. That little bit of extra warmth can help the rise.
8.) If you plan a freeform loaf, prepare a baking sheet by lining it with parchment and sprinkling a little cornmeal. If you’re using a pan, lightly grease it. Empty the dough onto your work surface and shape as desired.
9.) Cover with lightly oiled plastic wrap. Let the dough rise until it has again doubled. This rise is faster, about 1 to 2 hours. Towards the end of the rise time, preheat the oven to 350º F (177º C).
10.) Remove the plastic wrap, slash the top of the loaf, and pop it in the oven.
11.) Remove the bread from the oven and set it on a wire rack to cool. If you’ve used a bread pan, go ahead and tip the loaf out onto the rack.
You’ll be happier with the texture of your bread if you let it cool completely before cutting. It’s scrumptious warm from the oven, no argument from me, but cutting while warm leads to slightly gummy, dry bread.
