

Fall is nearly here, and do you know what that means? Fresh, homemade applesauce! Definitely one of my favorite foods to make, and to eat. And soooo much better than canned!
I’m fortunate to live in an area with several nearby orchards. Going apple picking is a favorite family and school activity around here, or you can buy your apples from the orchards’ farm stands. I usually get a couple of peck bags or several half-peck bags for making applesauce. Apples right from the orchard are much fresher than those in most grocery stores, and fresher is always better. Homemade applesauce has become a staple of our holiday meals. Since we might have as many as 16 people for Thanksgiving and again for Christmas, I need to make a lot of applesauce! Lucky for me, it freezes really well. The size batch I describe below makes enough to freeze for a holiday meal for 12 – 14 people, plus 2 or 3 meals for 2 – 3 people. I’ll use one gallon-size zip-top freezer bag to freeze for the holiday, and 2 or 3 quart-size bags for the other meals.
My favorite apple for applesauce is Cortland. It’s sweet enough that it often requires no added sugar, but is tart enough to be tasty, and holds just enough of its shape to get a nice, textured sauce. (I prefer a sauce with texture, rather than smoothly pureed.) Cortlands also make the best pink applesauce of any variety I’ve tried. Choose the reddest of the apples to get the pinkest color. Sometimes I’ll buy a couple of really red loose apples to boost the color if there aren’t very many dark red ones in the bag. In the early apple season, if Cortland apples aren’t available yet, I’ll use MacIntosh, but only if they’re pretty recently picked. I think they get a little mushy & bland after a while.
I like to leave the skin on the apples for cooking. I love the color it gives the applesauce. And of course, peeling would be a lot more work! Some people also believe the skins lend more flavor; they may be right. I don’t, however, like the skins enough to want to incorporate them into the finished sauce. I find them a bit bitter. I prefer to remove them at the food mill stage. If you want to keep them in your final sauce, just cook the apples a bit longer so that the skins soften enough to break down & pass through the mill.
There are also those who swear that leaving the seeds in while cooking lends more flavor. I disagree. I can’t tell any difference with or without seeds. I think it’s just more work at the food mill stage, so I core the apples before cooking. For years, I cut the apples into quarters, then cut the core bit out of each wedge by hand. Recently, I decided to use my Oxo corer/sectioner instead. It really speeds up the prep work, cuts down on the cooking time, and is much easier on the hands. My food mill is an Oxo, too. It’s the third one I’ve owned, and by far the best I’ve ever had. It doesn’t slide around the top of the pot, fits many different sizes of pots, is easy to assemble & disassemble (& therefore easy to clean), & it does a great job. Its big knob is also more ergonomic than is found on many other brands.
Although there are cinnamon sticks in the cooking water, this is not “cinnamon applesauce.” For that, I think you’d have to add ground cinnamon. The sticks just lend a subtle depth to the apple flavor; the cinnamon flavor doesn’t stand out at all. You’ll find a printer-friendly version at the bottom of this page.
“I love you, a bushel and a peck; you bet your purdy neck, I do!” — Guys & Dolls
Ingredients:
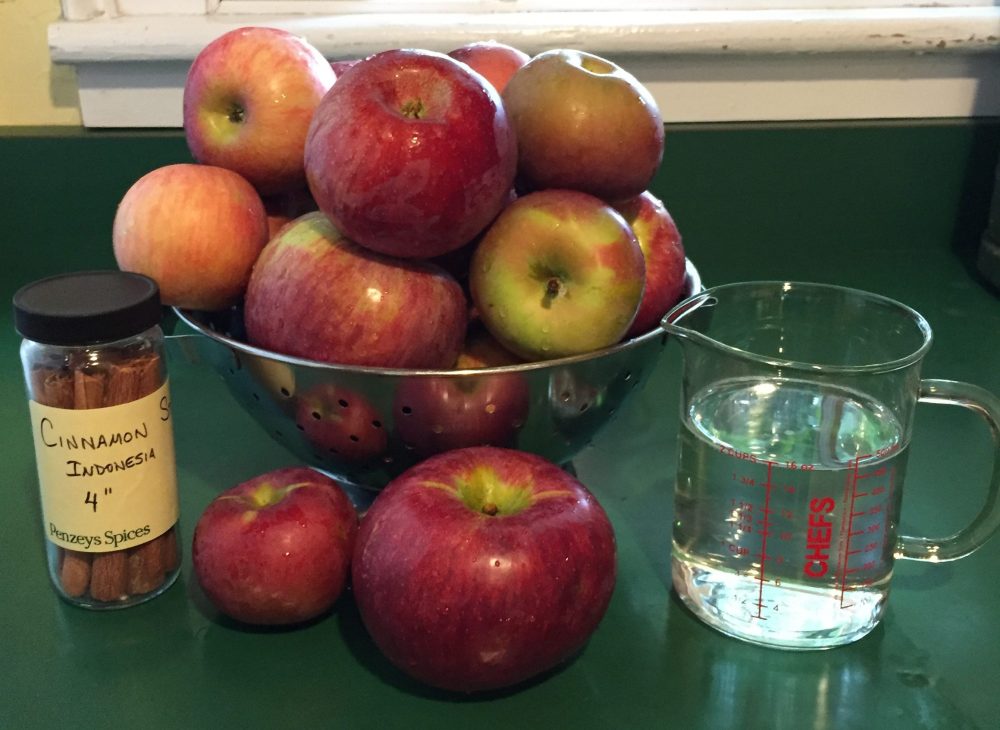
¾ of a peck of Cortland apples (about 7½ pounds, or about 30 medium apples)
2 cinnamon sticks
2 cups water
sugar as needed (I didn’t need any for this batch.)
Preparation:
1.) Put the water & cinnamon sticks into an 8-quart pot. Wash the apples thoroughly. Core and cut into sections with an Oxo cutter…

…or a knife.


2.) Discard the cores, & put the sections in the pot. You can fill it right up to the top since the apples will compress as they soften. Just be careful when stirring!

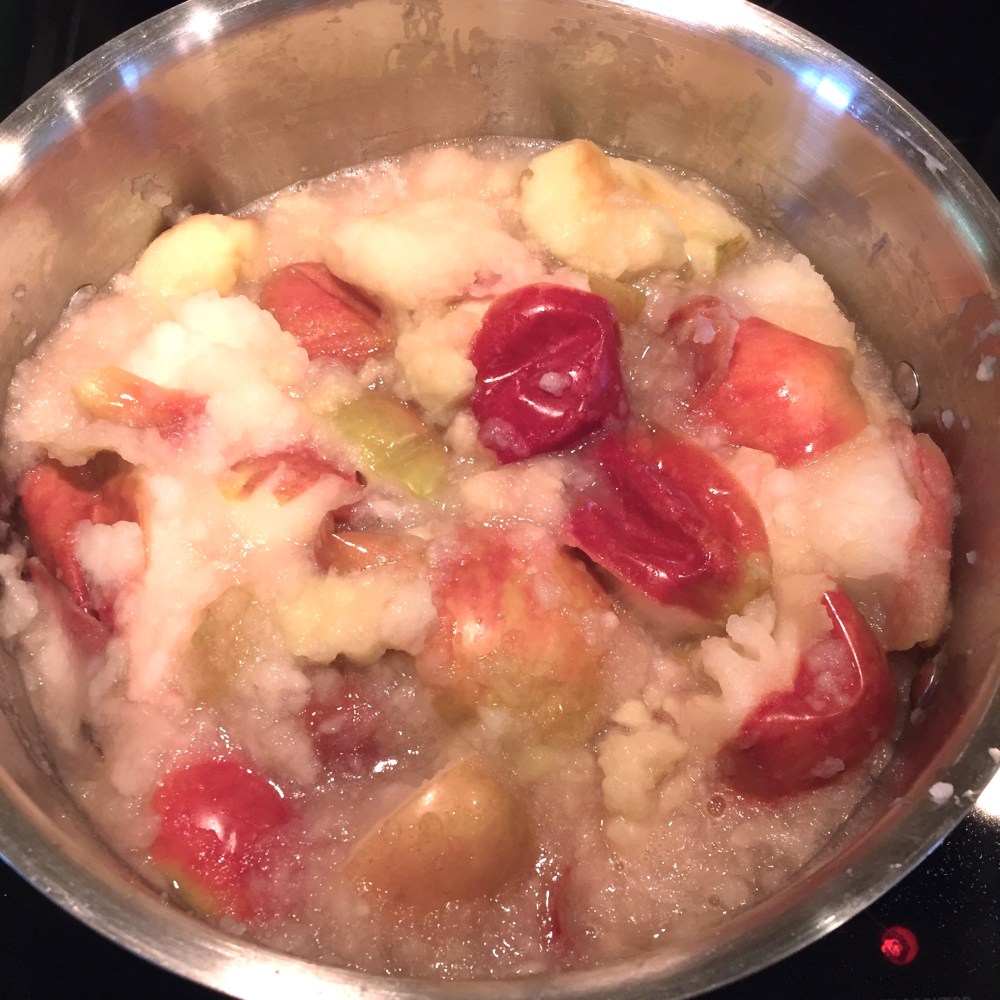
3.) Bring the pot to a boil, then reduce the heat to a slow boil for about 10 minutes. (The 10 minutes is for the smaller sections cut by the corer/sectioner. Cook for 15 – 20 minutes if you’ve quartered the apples with a knife.) Stir frequently, making sure to scrape the bottom to prevent scorching. When stirring, think “up, down,” rather than “round & round.” The bottom apples will get soft quickly, so stir them up towards the top. Look for apples toward the top of the pot that are still firm, & push them down towards the bottom. This will help them all cook evenly. You’ll know they’re done when some are already falling apart & the rest give easily when poked with your spoon. The pot will be considerably less full.
4.) Remove from heat. Give one last push down to any sections that seem firmer than the rest, so that the residual heat can continue to soften them. Allow to cool at room temperature for about a half hour.
5.) Remove the cinnamon sticks. Working in batches, run the cooked apples through a large-hole food mill. (Use a smaller hole if you like smoother applesauce.) If you’ve not used one before, the process is simple: clockwise about 10 turns, then counterclockwise for one or two turns. This helps keep the holes from getting clogged. Discard the skins that pile up, before adding the next batch. I usually keep a bowl nearby to collect them all, & throw them out all at once when I’m done. When all of the apples have been through the mill, scrape off any yummy sauce that’s hanging from the bottom.


6.) Here’s the fun part: the taste test! Any nearby volunteers are usually willing and eager to lend their opinion, too. Add a little sugar if the sauce is too tart for your liking, then stir & re-taste. Repeat as needed. Keep in mind that chilled applesauce usually tastes sweeter than it did when it was warm. You can always add more sugar later if you need to, but you can’t take any out. Refrigerate for at least a few hours or overnight, so the applesauce has a chance to further cool down.
7.) Return to the refrigerator any applesauce you plan to use in the next week or so. Portion the rest off into zip-top freezer bags. I like to use a four-cup glass measuring cup to put the bag in, folding the edges down over the outside. I learned this the hard way, after trying to just hold the bags open. It only takes one time of having the bag fall over & spill all that precious applesauce! Squeeze all the air out of the bags, label them, & lay flat to freeze. I find frozen applesauce is best used within three to four months. It’s still okay to eat after that, but it won’t be as good. Move the smaller bags to the fridge the night before you want to serve them. Give any gallon-size bags 36 – 48 hours in the fridge. This will soften the applesauce enough to be able to get it out of the bags. Then you can break it up & use a glass dish to microwave it a bit if it’s still too cold. While Ziploc says it’s safe to microwave their bags, I prefer to avoid microwaving plastic whenever I can.


Homemade Applesauce
Ingredients
¾ of a peck of Cortland apples (about 7½ pounds, or about 30 medium apples)
2 cinnamon sticks
2 cups water
sugar as needed
Directions
1.) Put the water & cinnamon sticks into an 8-quart pot. Wash the apples thoroughly. Core and cut into sections with an Oxo cutter or a knife.
2.) Discard the cores, & put the sections in the pot. You can fill it right up to the top since the apples will compress as they soften. Just be careful when stirring!
3.) Bring the pot to a boil, then reduce the heat to a slow boil for about 10 minutes. (The 10 minutes is for the smaller sections cut by the corer/sectioner. Cook for 15 – 20 minutes if you’ve quartered the apples with a knife.) Stir frequently, making sure to scrape the bottom to prevent scorching. When stirring, think “up, down,” rather than “round & round.” The bottom apples will get soft quickly, so stir them up towards the top. Look for apples toward the top of the pot that are still firm, & push them down towards the bottom. This will help them all cook evenly. You’ll know they’re done when some are already falling apart & the rest give easily when poked with your spoon. The pot will be considerably less full.
4.) Remove from heat. Give one last push down to any sections that seem firmer than the rest, so that the residual heat can continue to soften them. Allow to cool at room temperature for about a half hour.
5.) Remove the cinnamon sticks. Working in batches, run the cooked apples through a large-hole food mill. (Use a smaller hole if you like smoother applesauce.) If you’ve not used one before, the process is simple: clockwise about 10 turns, then counterclockwise for one or two turns. This helps keep the holes from getting clogged. Discard the skins that pile up, before adding the next batch. When all of the apples have been through the mill, scrape off any yummy sauce that’s hanging from the bottom.
6.) Add a little sugar if the sauce is too tart for your liking, then stir & re-taste. Repeat as needed. Keep in mind that chilled applesauce usually tastes sweeter than it did when it was warm. Refrigerate for at least a few hours or overnight, so the applesauce has a chance to further cool down.
7.) Return to the refrigerator any applesauce you plan to use in the next week or so. Portion the rest off into zip-top freezer bags. I like to use a large glass measuring cup to put the bag in, folding the edges down over the outside. Squeeze all the air out of the bags, label them, & lay flat to freeze. I find frozen applesauce is best used within three to four months. It’s still okay to eat after that, but it won’t be as good. Move the smaller bags to the fridge the night before you want to serve them. Give any gallon-size bags 36 – 48 hours in the fridge. This will soften the applesauce enough to be able to get it out of the bags. Then you can break it up & use a glass dish to microwave it a bit if it’s still too cold. While Ziploc says it’s safe to microwave their bags, I prefer to avoid microwaving plastic whenever I can.
