

If you’ve ever been to Abbott’s in Rochester, NY, you probably know that black raspberry frozen custard is a thing. Abbott’s first custard stand opened back in 1926, across the street from Lake Ontario. It was a popular spot for beachgoers in the summertime. They’ve since expanded to a handful of other areas, but unfortunately not here. So we always liked to stop in for custard whenever we went back to Rochester to visit my parents, who grew up going to the original stand. Chocolate and vanilla are always available, usually with one or two flavors of the day. Black Raspberry has always been a family favorite.
This past Saturday was our annual Meatfest. It’s when we get together with my sister’s family for a big dinner in the summer. The one constant on the menu is meat – usually too much of it, hence the name. Good thing we all like leftovers! In the middle of this incredibly rainy summer, we really lucked out to have nice enough weather to eat out on the porch.

Last year I made ice cream for dessert, which was a big hit. So this year, since we don’t get out to Rochester much anymore, I decided to give black raspberry a try. I got these gorgeous, freshly-picked black raspberries from Kristy’s Barn. I bought far more than is needed for a single batch of ice cream because I knew I’d need two batches, and I wanted extra berries so that I could try a couple of different methods.

Abbott’s has a lovely silky smooth texture, which I hoped to replicate — or at least come close. I found several recipes online, so I tried making it a couple of different ways. The first try, I used a fine mesh strainer to strain out the seeds. That left me with pulpy black raspberry extract, with little flecks of skin. It tasted great but didn’t look the way I wanted it to. The next try, I used this jelly strainer bag. (I’m including the link for convenience only. I don’t get paid by Amazon.) If you don’t want to use one, a fine mesh strainer is perfectly acceptable so long as you don’t mind the flecks. Just put the puree in the strainer, let it drip a while, and periodically scrape the inside to move the pulp out of the way so the juice can get through.


I’m not gonna lie, black raspberry is probably the most time-consuming and labor-intensive ice cream I’ve made yet. But it’s a labor of love I’m more than willing to tackle, since it and the memories it brings are so sweet.
Ingredients:

1 pound black raspberries (a little over a pint – those are half-pint cartons, and I only needed about half of the third one for a single batch of ice cream.)
½ tsp lemon juice
2 cups heavy cream
⅔ cup + 3 Tbsp sugar, divided
⅛ tsp + a pinch fine sea salt, divided
6 large egg yolks
1 jelly strainer bag (optional)
Preparation:
1.) Be sure to put your ice cream maker bowl in your freezer at least a day or two in advance.
Rinse the berries and drain well. Place them in the bowl of a food processor fitted with the metal blade. Add the lemon juice, 3 Tablespoons of the sugar, and a pinch of salt. Process until well combined and relatively uniform, with a slurry consistency.


2.) Suspend the jelly bag on a stand over a bowl or in a very tall pot; tie tightly. The bottom of the bag should be well above the bottom of the pot. You’re leaving room for about a cup and a half of juice to accumulate. Pour the berry slurry into the bag, and let sit to drain.
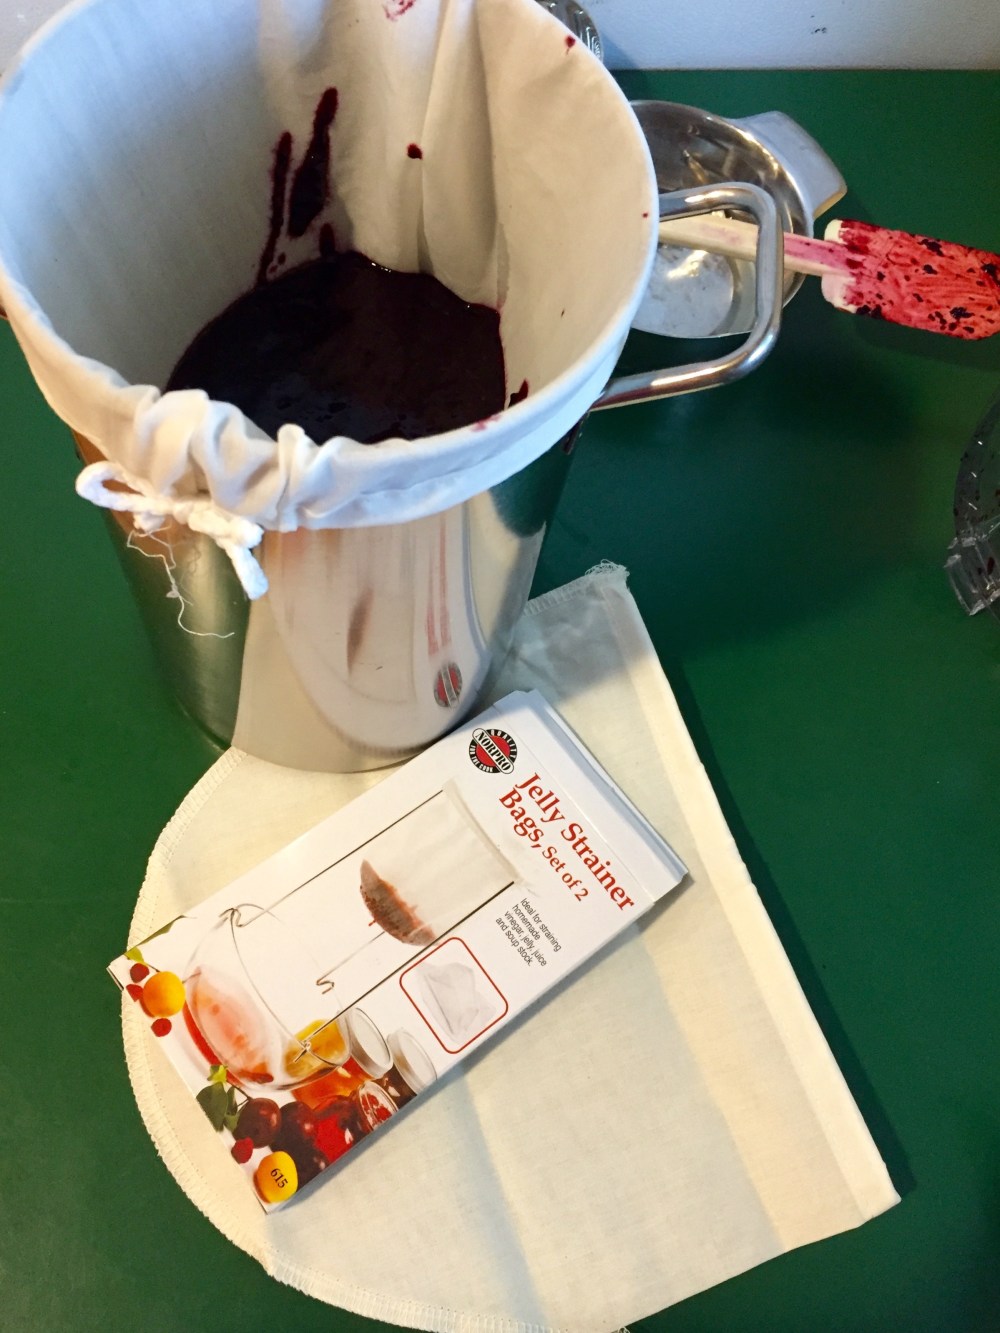
3.) After it looks like it’s mostly done draining, squeeze as much juice as you can. I did this by hand, wearing food service vinyl gloves, and found I was able to get quite a bit more juice. Set the juice aside. (If you want to do all the juice prep a day ahead, just refrigerate the juice until you’re ready for it. Adding cold juice to the custard base will also help it cool more quickly.) Discard the seeds and pulp from the bag.


4.) Combine the cream, ⅔ cup of the sugar, and ⅛ teaspoon of the salt in a 2½ quart saucepan; stir. Cook over medium-low heat, stirring frequently, until the sugar and salt are dissolved and a faint wisp of steam escapes when you stir. Remove from heat.

5.) While the cream heats, separate the eggs. I find the easiest way to do this is by hand. Just let the whites slide between your fingers. Place the yolks in a medium bowl, saving the whites for another use.


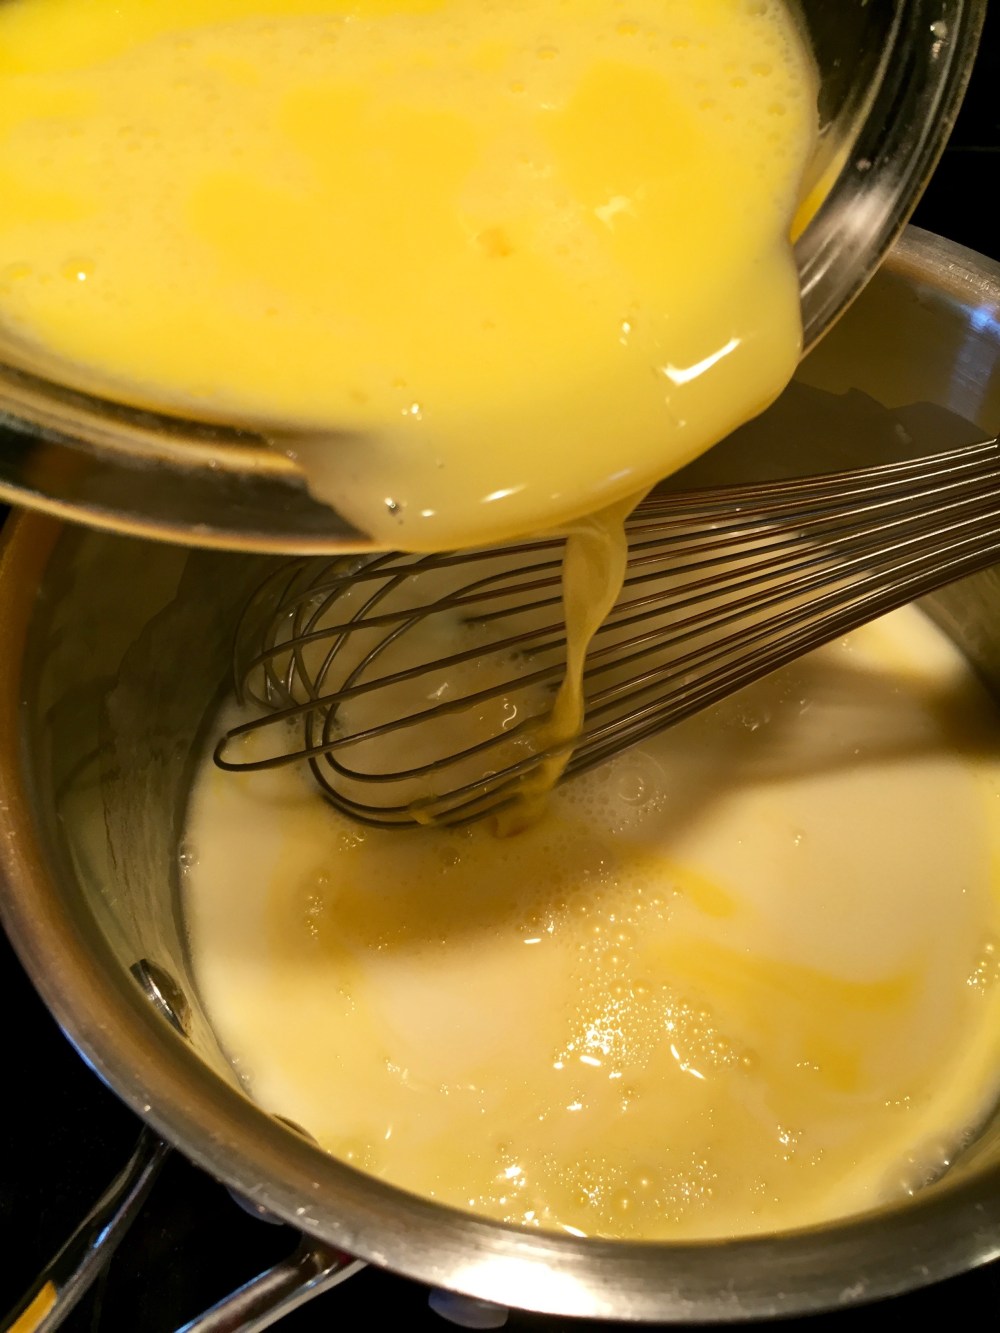
6.) Whisk the yolks. Then, whisking constantly, slowly pour about a cup of the hot cream mixture into the whisked yolks.

7.) Whisking constantly, slowly pour the egg yolk mixture back into the pot. Once it’s well-blended, return to medium-low heat.
8.) Stirring frequently, cook until the mixture begins to thicken. It’s ready when it reaches 170℉ and is thick enough to coat the back of a spoon. If you run your finger across the spoon, the mixture doesn’t run back in to fill the empty spot. This will only take a few minutes, so keep a close eye on the pot.

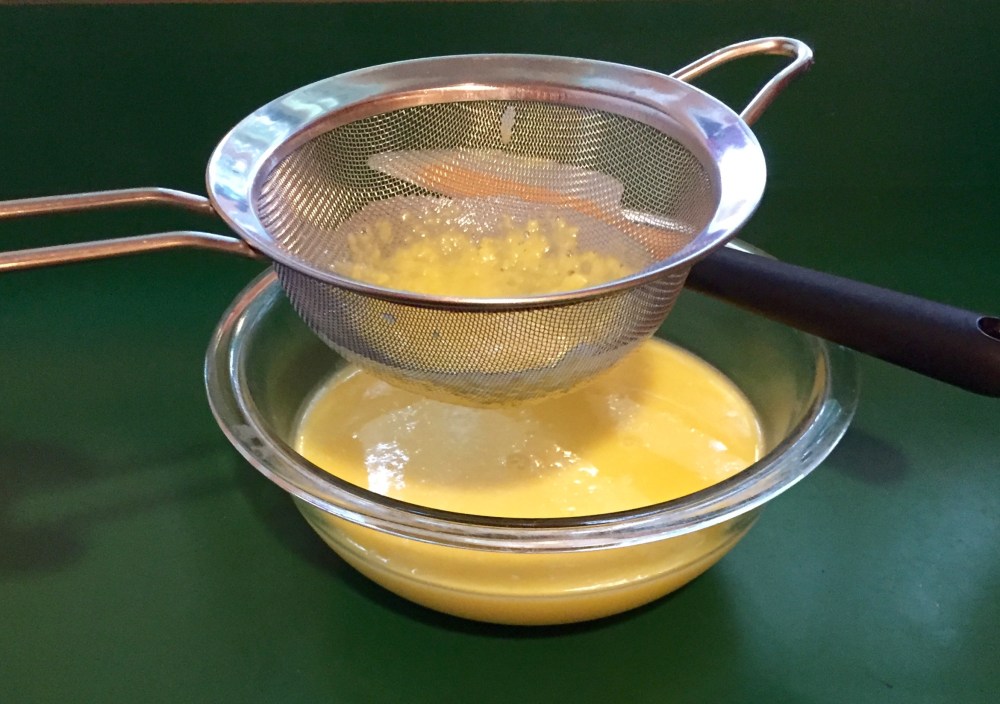
9.) Remove from heat and pour through a fine mesh strainer into a bowl. This will catch any little bits of egg white that clung to the yolks.
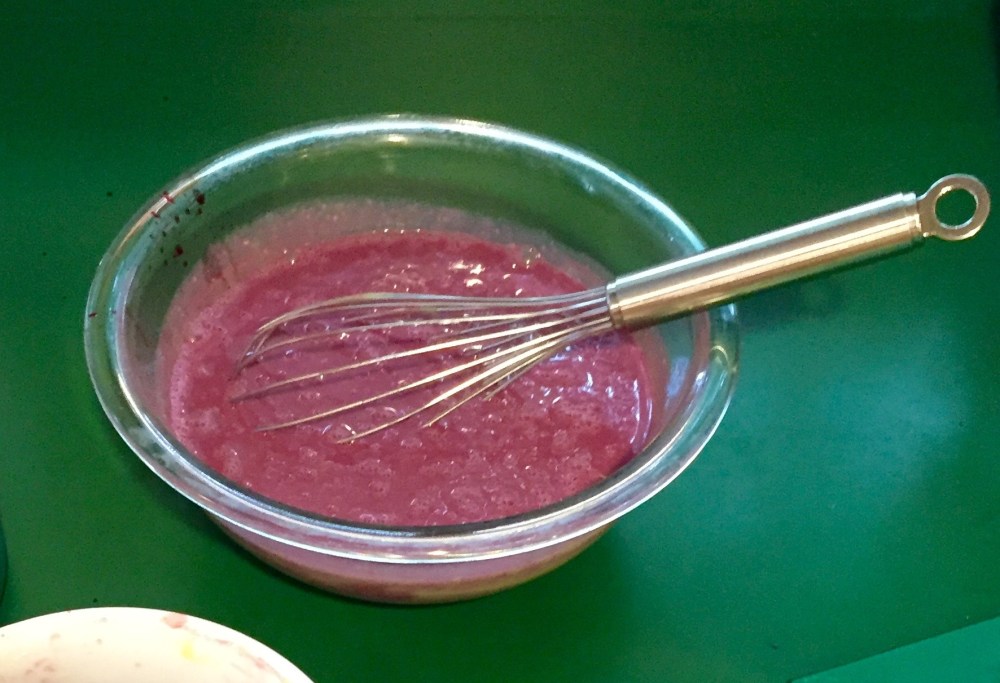
10.) Whisk in the juice from step 3. Allow the mixture to come to room temperature, then refrigerate for at least four hours or overnight.
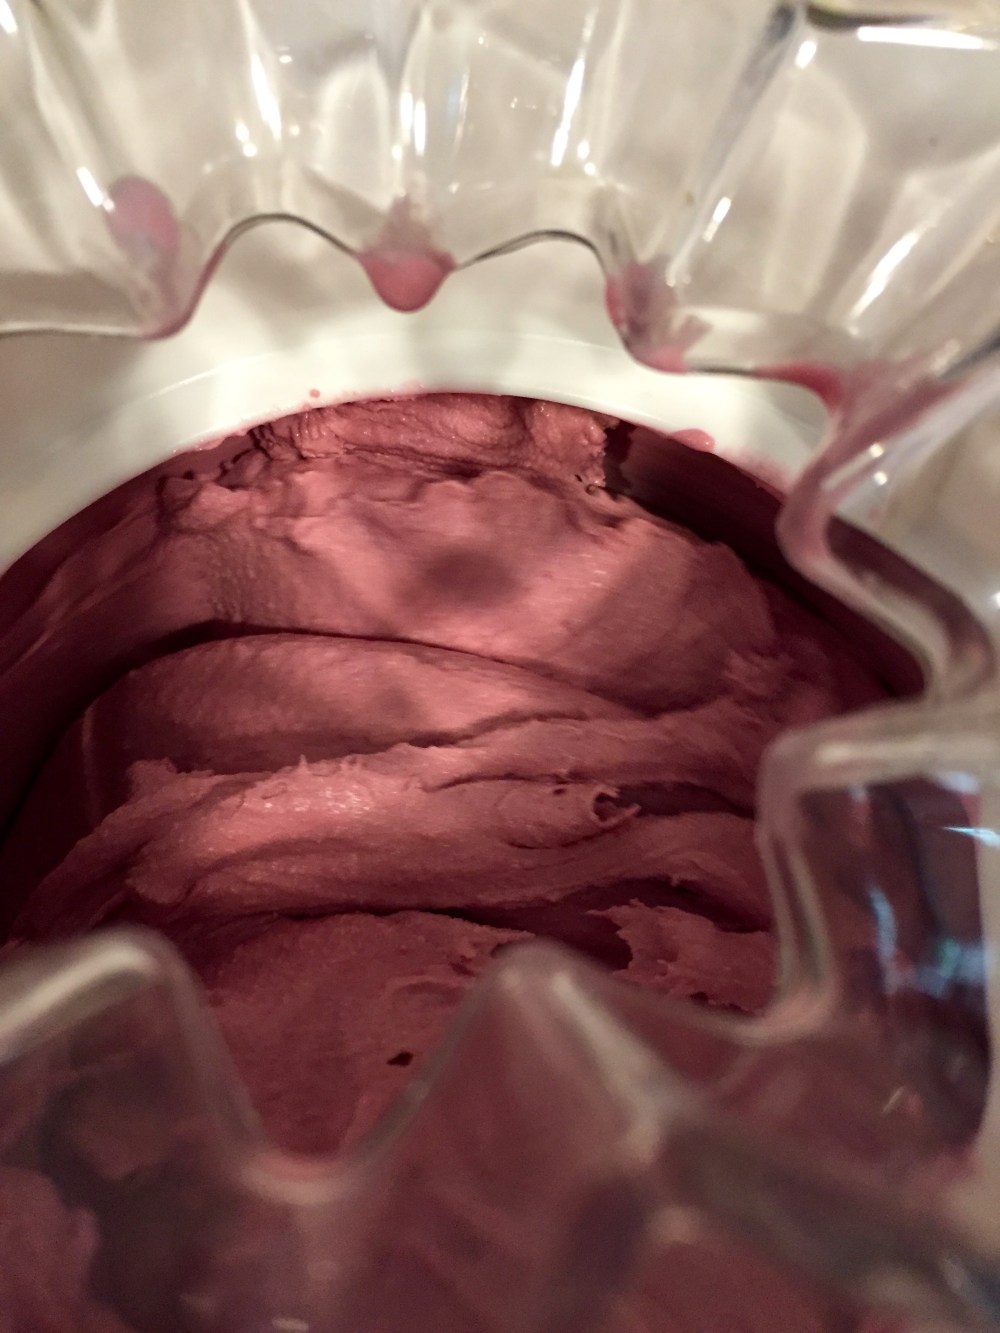
11.) Churn for 30 – 35 minutes or whatever length of time is recommended by the manufacturer of your ice cream maker. Serve immediately for soft-serve, or freeze for several hours for hard ice cream.
Black Raspberry Frozen Custard
Ingredients
1 pound black raspberries (a little over a pint)
½ tsp lemon juice
2 cups heavy cream
⅔ cup + 3 Tbsp sugar, divided
⅛ tsp + a pinch fine sea salt, divided
6 large egg yolks
1 jelly strainer bag
Directions
1.) Be sure to put your ice cream maker bowl in your freezer at least a day or two in advance.
Rinse the berries and drain well. Place them in the bowl of a food processor fitted with the metal blade. Add the lemon juice, 3 Tablespoons of the sugar, and a pinch of salt. Process until well combined and fairly uniform, with a slurry consistency.
2.) Suspend the jelly bag on a stand over a bowl or in a very tall pot; tie tightly. The bottom of the bag should be well above the bottom of the pot. You’re leaving room for about a cup and a half of juice to accumulate in the pot. Pour the berry slurry into the bag, and let sit to drain.
3.) After it looks like it’s mostly done draining, squeeze as much juice as you can. I did this by hand, wearing food service vinyl gloves, and found I was able to get quite a bit more juice. Set the juice aside. (If you want to do all the juice prep a day ahead, just refrigerate the juice until you’re ready for it. Adding cold juice to the custard base will help it cool more quickly.) Discard the seeds and pulp from the bag.
4.) Combine the cream, ⅔ cup of the sugar, and ⅛ teaspoon of the salt in a 2½ quart saucepan; stir. Cook over medium-low heat, stirring frequently, until the sugar and salt are dissolved and a faint wisp of steam escapes when you stir. Remove from heat.
5.) While the cream heats, separate the eggs. I find the easiest way to do this is by hand. Just let the whites slide between your fingers. Place the yolks in a medium bowl, saving the whites for another use.
6.) Whisk the yolks. Then, whisking constantly, slowly pour about a cup of the hot cream mixture into the whisked yolks.
7.) Whisking constantly, slowly pour the egg yolk mixture back into the pot. Once it’s well-blended, return to medium-low heat.
8.) Stirring frequently, cook until the mixture begins to thicken. It’s ready when it reaches 170℉ and is thick enough to coat the back of a spoon. If you run your finger across the spoon, the mixture doesn’t run back in to fill the empty spot. This will only take a few minutes, so keep a close eye on the pot.
9.) Remove from heat and pour through a fine mesh strainer into a bowl. This will catch any little bits of egg white that clung to the yolks.
10.) Whisk in the juice from step 3. Allow the mixture to come to room temperature, then refrigerate for at least four hours or overnight.
11.) Churn for 30 – 35 minutes or whatever length of time is recommended by the manufacturer of your ice cream maker. Serve immediately for soft-serve, or freeze for several hours for hard ice cream.
