
Thick, rich, deeply flavored brown gravy. A roast turkey seems naked without it! There’s a longstanding tradition in my family that you get to choose the dinner menu on your birthday. For me, that meant that not only would I get to have my favorite dinner (roast pork with Lawrey salt rub, applesauce, & corn on the cob) in early August for my own birthday, but I’d also get to have roast turkey in early February. That’s because it was my sister’s birthday, and her favorite dinner – at least when we were kids. My mom always made the best gravy. She told me once that it was my Dad’s mom who taught her how. So Mom taught me, and gravy became something that meant celebration and family, in addition to being just plain scrumptious. So, although I can’t be there to make this for you in person, Happy Birthday, Sal!
I have to admit, my first few attempts weren’t as good as Mom’s gravy. There is a bit of a learning curve, but I think it’s more about confidence than learning. I’m told I have a tendency to over-think things sometimes, and that’s not necessarily a good thing. You see, the trick is to brown the pan drippings as far as you dare – that is, to the point just before they scorch. The closer you can get to that line without crossing it, the tastier your gravy will be. It can also be a bit scary that there isn’t a recipe in the traditional sense. I won’t be giving you precise measurements. That’s because every turkey (or chicken) is different. There’s no way to predict the amount or composition of the pan drippings ahead of time, so you just have to wing it. (Sorry, I couldn’t resist. I live with a punster; it sometimes rubs off on me.) Anyway, the gravy should be the last thing you do before serving dinner. Ideally, get your helpers busy plating everything else & delivering it to the table, so that you can concentrate on the gravy. If you want a little low-stress practice with browning pan drippings, make a batch of Homemade Chicken Noodle Soup. (See that post also for photos of pan drippings from smaller birds.)
There was a time when making gravy stressed me out a bit. Well, when I say “a bit,” I mean a lot. It really doesn’t need to – like so many other things, it really helps to get your ducks in a row (oh, there I go again) before you start. That’s because sometimes the pan drippings will brown really quickly, and you just need to be ready. I took these photos last Thanksgiving. At first when I decided to do a post about gravy, I wasn’t sure I could manage doing the photos while putting a holiday dinner for 11 on the table. But oh, my goodness, did this turkey ever cooperate! I’m really kicking myself, though, because while I did manage to photograph the gravy prep, I didn’t get a photo of the actual turkey. It was, hands down, the best turkey we’ve ever had, and the most incredible pan drippings I’ve ever had the pleasure to turn into gravy. So don’t worry if your pan doesn’t look quite like mine, you don’t always get this much gorgeousness to work with, with plenty of moistness & tenderness left for the meat. Or, for your next turkey, head on over to McEnroe Organic Farm and get your own! That’s where this one came from, a twenty-one pounder, and where we’ll also get next year’s if I have anything to say about it. Which, of course, I do. My apologies to the McEnroe folks for not having a photo of that beautiful bird. I sure will next year!
So, here’s how Mom taught me:
1.) Roast your turkey in a high-sided roasting pan that can go on the stove. A pan that’s too shallow will splatter turkey fat all over the place when you get it going. I prefer a regular pan, not non-stick, because there are some high temperatures involved.
2.) When your turkey is almost done, get everything ready. You’ll need:
· A flat-edged wooden spoon.
· A whisk, ideally a flat one. You can get by with any whisk, but the flat ones are best.
· A kettle or large measuring cup full of hot water.

· Flour slurry. You make this by combining flour and water. I like to use a shakeable container, as it’s really easy to mix. Start with roughly half a cup of flour, add room temperature water, and shake. The slurry consistency should be just a bit thicker than you want your gravy to be.
· A little salt, if you’re so inclined. Or omit it, & let people add their own.
3.) Transfer the finished turkey to a carving platter, and tent with foil until you’re ready to carve. Place your roasting pan over your largest burner, or span 2 burners with it if your stove permits. Turn the heat up to medium-high. Here’s where you might get some splatters, so be prepared. Watch it pretty closely. The drippings directly over the burner will brown fastest, of course, so occasionally push everything around with your wooden spoon to keep it even.


4.) Keep going, until the drippings are starting to get sticky & dark brown, as dark as you dare without letting them burn. They won’t really seem as liquid at this point, it’ll be starting to look more like the stuff you think of as “baked on, how-will-I-ever-clean-this-pan.” They’re thick enough that when you scrape the bottom of the pan with the spoon, it takes a few seconds for the drippings to fill in the hole.

5.) The minute you decide you’ve gone far enough, dump in some hot water. Be generous, it’s easy to cook off any excess. You want enough to cover the bottom of the pan and any little hills of cooked-on brownings. Let it boil freely, while you use your wooden spoon to scrape the bottom & sides of the pan. Keep stirring & scraping until every last bit of brownings is dissolved.

6.) Taste-test a bit here, just put a little on a spoon, blow it cool, and see if it’s too watery. Boil it down until you like its strength, then just a touch more. Turn the heat down if you’ve gas or induction, & off if it’s an electric cooktop.
7.) Whisking constantly, pour in a bit of the slurry. Try just about a tablespoon at a time for turkey, or a teaspoon at a time for chicken, until you get a feel for it. Whisk each addition in completely before deciding if you need more. Keep an eye on the thickness & color of the gravy. Taste every once in a while, in case you need to pause to let a little more water cook off.

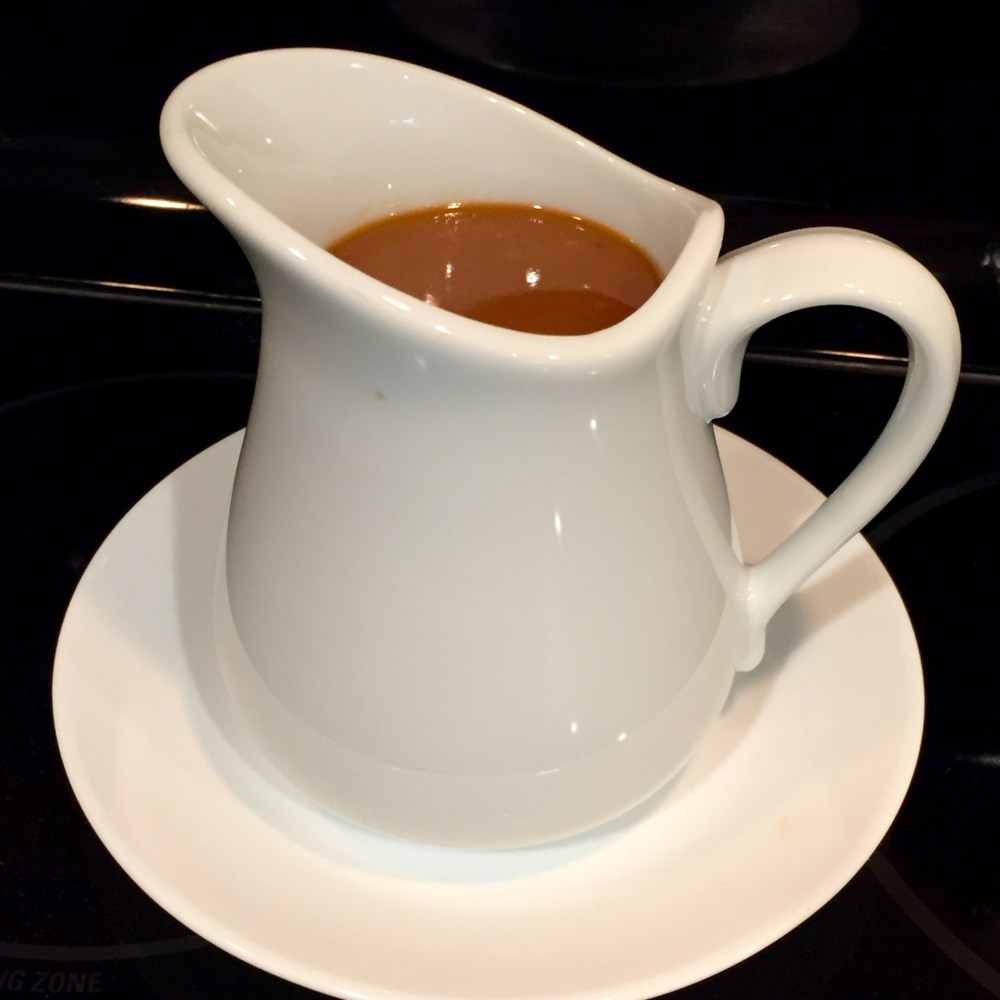
8.) Add salt to taste, or don’t. Pour the gravy off into a gravy boat or small pitcher. Enjoy!
Best Homemade Gravy
Ingredients
roast turkey (or chicken) pan drippings
flour
water
Directions
1.) Roast your turkey in a high-sided roasting pan that can go on the stove. A pan that’s too shallow will splatter turkey fat all over the place when you get it going. I prefer a regular pan, not non-stick, because there are some high temperatures involved.
2.) When your turkey is almost done, get everything ready. You’ll need:
• A flat-edged wooden spoon.
• A whisk, ideally a flat one.
• A kettle or large measuring cup full of hot water.
• Flour slurry. You make this by combining flour and water. I like to use a
shakeable container, as it’s really easy to mix. Start with roughly half a
cup of flour, add room temperature water, and shake. The slurry consistency
should be just a bit thicker than you want your gravy to be.
• A little salt, if you’re so inclined. Or omit it, & let people add their own.
3.) Transfer the finished turkey to a carving platter, and tent with foil until you’re ready to carve. Place your roasting pan over your largest burner, or span 2 burners with it if your stove permits. Turn the heat up to medium-high. Here’s where you might get some splatters, so be prepared. Watch it pretty closely. The drippings directly over the burner will brown fastest, of course, so occasionally push everything around with your wooden spoon to keep it even.
4.) Keep going, until the drippings are starting to get sticky & dark brown, as dark as you dare without letting them burn. They won’t really seem as liquid at this point, it’ll be starting to look more like the stuff you think of as “baked on, how-will-I-ever-clean-this-pan.” They’re thick enough that when you scrape the bottom of the pan with the spoon, it takes a few seconds for the drippings to fill in the hole.
5.) The minute you decide you’ve gone far enough, dump in some hot water. Be generous, it’s easy to cook off any excess. You want enough to cover the bottom of the pan and any little hills of cooked-on brownings. Let it boil freely, while you use your wooden spoon to scrape the bottom & sides of the pan. Keep stirring & scraping until every last bit of brownings is dissolved.
6.) Taste-test a bit here, just put a little on a spoon, blow it cool, and see if it’s too watery. Boil it down until you like its strength, then just a touch more. Turn the heat down if you’ve gas or induction, & off if it’s an electric cooktop.
7.) Whisking constantly, pour in a bit of the slurry. Try just about a tablespoon at a time until you get a feel for it. Whisk each addition in completely before deciding if you need more. Keep an eye on the thickness & color of the gravy. Taste every once in a while, in case you need to pause to let a little more water cook off.

One Comment Add yours