

One of my favorite family traditions around the holiday season is decorating these rich, buttery cookies. Participation is mandatory from a very young age, whether you were born into the family or joined later. We’d have different colors of frosting, all sorts of sprinkles, colored sugar, cinnamon candies, and silvers. That’s what we called the silver-colored dragees. Back then, we ate them, but now they come with warning labels that say not to. We’d set the finished cookies on long sheets of wax paper to let the frosting set. My mom was the queen chef, but my dad was king decorator. His patience and meticulousness were endless, and he always came up with something new. We all were more creative just by watching him. I wish I had some photos of his cookies!

My husband isn’t as fond of the tradition as I am, having come to it a bit later in life. But he always does a few cookies anyway, being the good sport that he is. When our kids were little, I used to make multiple batches just to be sure there were still a few left for Santa on Christmas Eve. That meant the decorating seemed to go on forever, so I do see his point. There’s some consolation in the fact that you get to eat any broken cookies. I’ve noticed that they seem to break ever more frequently as the decorators get bored. I would never suggest that some of the breakage is intentional…
Cookie cutters come in all different shapes, of course. The photos don’t show our usual variety. We make stocking shapes, stars, snowflakes, angels, lights, reindeer, bells, and wreaths, along with the trees. I’ve also made these cookies as hearts to mail to my kids on Valentine’s Day when they were away at school, which is how I found out that they’re Willie’s favorite cookies. Willie is our Labrador, so really whatever he is eating is his favorite cookie, even if it’s not an actual cookie. I’d made an enormous batch, decorated them, and left them out on the table for the icing to set before packing them in boxes. Willie was in the woodshed, so the cookies were safe…until someone opened the door. He must have eaten forty cookies! I’m convinced that’s what he thought he’d find several years later when he got into a bag of flour before I’d had a chance to put all the groceries away. Sorry, Willie, raw flour just isn’t the same!

You’ll find a printer-friendly version of the recipe at the bottom of this page.
“Nobody else in the entire galaxy has ever even bothered to make edible ball bearings. Genius!” — The Doctor
Ingredients:
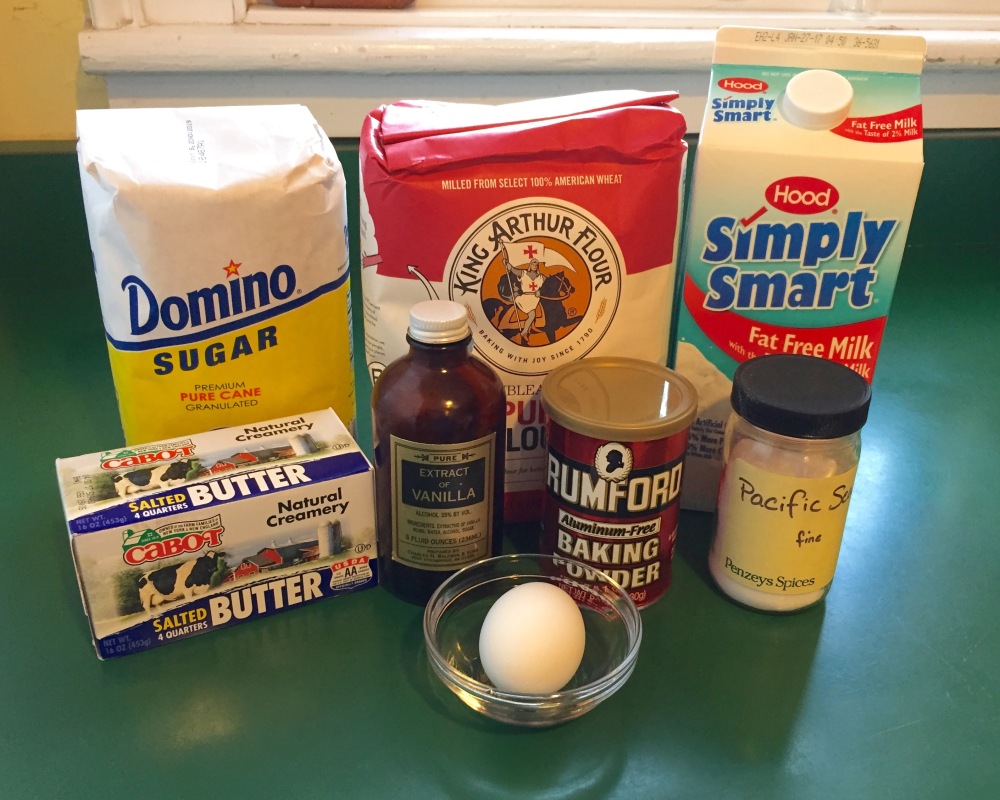
1 cup softened butter (2 sticks)
¾ cup sugar
1 unbeaten egg
2 Tbsp milk (any kind, from skim to whole)
1½ tsp vanilla
3 cup flour
1 tsp baking powder
½ tsp salt
Preparation:
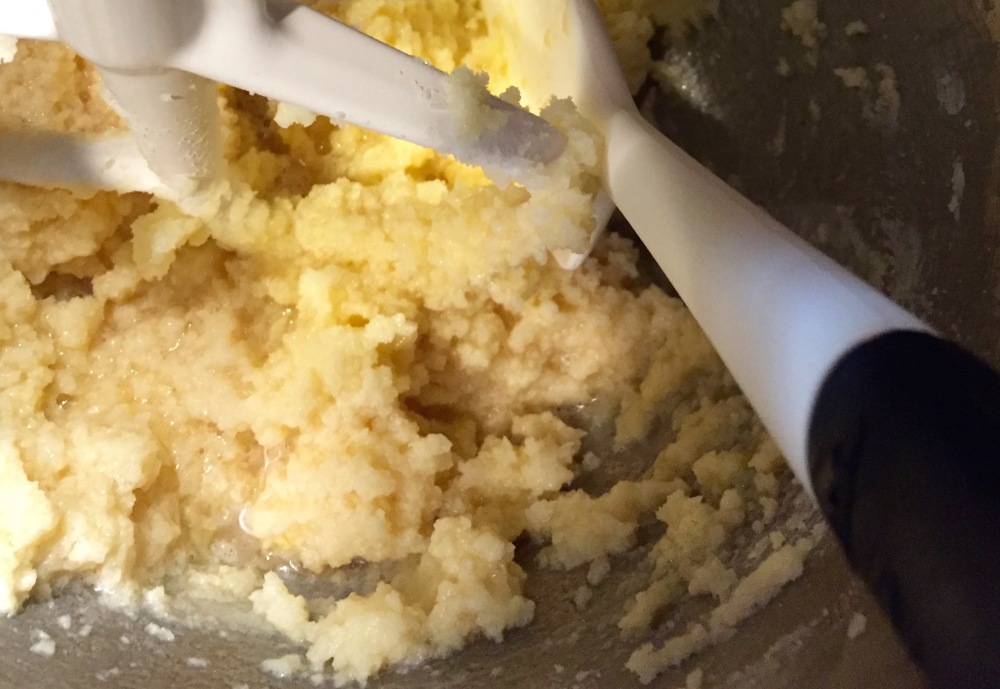
1.) Cream butter and sugar.

2.) Mix in the egg, milk, and vanilla.
3.) In a separate bowl, whisk together flour, baking powder, and salt.

4.) Add the dry ingredients to the mixing bowl. Mix until well blended, starting at your lowest speed so that the flour doesn’t fly all over your kitchen.

5.) Divide the dough into 3 parts, pat it flat, and wrap in plastic. Refrigerate for one hour.

6.) Preheat oven to 400°F. Dust your work surface and rolling pin with flour.

7.) Take the first third of the dough out of the fridge (it will be very stiff) and roll it out to ⅛” thickness. Use a cookie cutter to make the cookie shapes, and transfer them to an ungreased or parchment-lined cookie sheet. A scraper can help with this if the dough does stick to the counter. Repeat with the remaining dough pieces, re-dusting the work surface and rolling pin as needed. Combine all the scraps and roll them out, too. Continue until all the dough is used.


8.) Bake at 400°F for 5 – 8 minutes, or until edges are just beginning to brown. Let them cool on the cookie sheet for a couple of minutes before removing them to a wire rack to finish cooling.


9.) Frost and decorate as desired. My favorite is Buttercream Frosting.

Butter Cookies
Ingredients
1 cup softened butter (2 sticks)
¾ cup sugar
1 unbeaten egg
2 Tbsp milk (any kind)
1½ tsp vanilla
3 cup flour
1 tsp baking powder
½ tsp salt
Directions
1.) Cream butter and sugar.
2.) Mix in the egg, milk, and vanilla.
3.) In a separate bowl, whisk together flour, baking powder, and salt.
4.) Add the dry ingredients to the mixing bowl. Mix until well blended, starting at your lowest speed so that the flour doesn’t fly all over your kitchen.
5.) Divide the dough into 3 parts, pat it flat, and wrap in plastic. Refrigerate for one hour.
6.) Preheat oven to 400°F. Dust your work surface and rolling pin with flour.
7.) Take the first third of the dough out of the fridge (it will be very stiff) and roll it out to ⅛” thickness. Use a cookie cutter to make the cookie shapes, and transfer them to an ungreased or parchment-lined cookie sheet. A scraper can help with this if the dough does stick to the counter. Repeat with the remaining dough pieces, re-dusting the work surface and rolling pin as needed. Combine all the scraps and roll them out, too. Continue until all the dough is used.
8.) Bake at 400°F for 5 – 8 minutes, or until edges beginning to brown. Let them cool on the cookie sheet for a couple of minutes before removing them to a wire rack to finish cooling.
9.) Frost and decorate as desired.

So yummy it is 🙂
LikeLiked by 1 person
Indeed!
LikeLiked by 1 person
Good Recipe!
LikeLiked by 1 person
Thanks! It’s one we always enjoy.
LikeLiked by 1 person
It Sounds Good! I Did a post on all different Candycane recipes!
LikeLike
I’ll have to check it out!
LikeLiked by 1 person
Thanks!
LikeLike